07. Putting It All Together with Resonance Audio
The Google VR audio spatializer, recently renamed to Resonance Audio, is very high quality and is optimized for mobile. Fundamentally, it replicates three natural phenomena to simulate three-dimensional audio:
- Interaural time differences. The spatializer creates slight delays between when a sound is played to each ear. In the real world, a sound wave coming from your left side will reach your left ear slightly sooner than your right. Our brains use this delay to interpret the position of sound sources. This is known as the Haas effect or the Precedence effect. Unfortunately, it only works well for frequencies less than 1.5khz.
- Interaural level differences. The spatializer attenuates sound sources between each ear to simulate a sound coming from the left or right side.
- Spectral filtering done by our outer ears. The shape of our ears filters sound waves differently depending on their directionality. The spatializer uses head-related-transfer-functions (HRTFs) to replicate this phenomena.
In addition to modeling the acoustics of the human head, the Google VR audio spatializer also models the reflections that occur in your synthetic VR environment. It accurately models direct sound waves along with early and late reflections.
In this section, we’ll spatialize our sound sources in Unity using the Google VR audio spatializer. In the next lesson, we’ll bring in our actual 360 footage and sync it to the audio. For now, we’ll just use spheres as representations of where we would like each audio source to be.
To begin, create a new Unity project and called it SpatialAudioTest.
Now complete the following steps to set up the scene:
- Import your rendered audio tracks into the project.
- Configure Google VR SDK
- Download the Resonance Audio unitypackage file and import it.
- Set the spatializer plugin and Ambisonic Decoder plugin to Resonance Audio by going to Edit > Project Settings > Audio.

- Set the camera position to (0,0,0)
- Add the Resonance Audio Listener component to the main camera.

- With the camera in the center, create and position spheres to represent each audio source in the video.
- Add the Resonance Audio Source to your spheres and assign a rendered audio to each AudioClip reference.
- Also check the “Enable occlusion” box on each object.


Your project window should look similar to this.
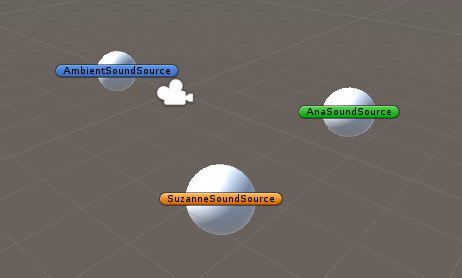
Your 3D scene should look similar to this. Each sphere represents a sound source in your video. (I’ve added game object icons to make each source easier to identify).
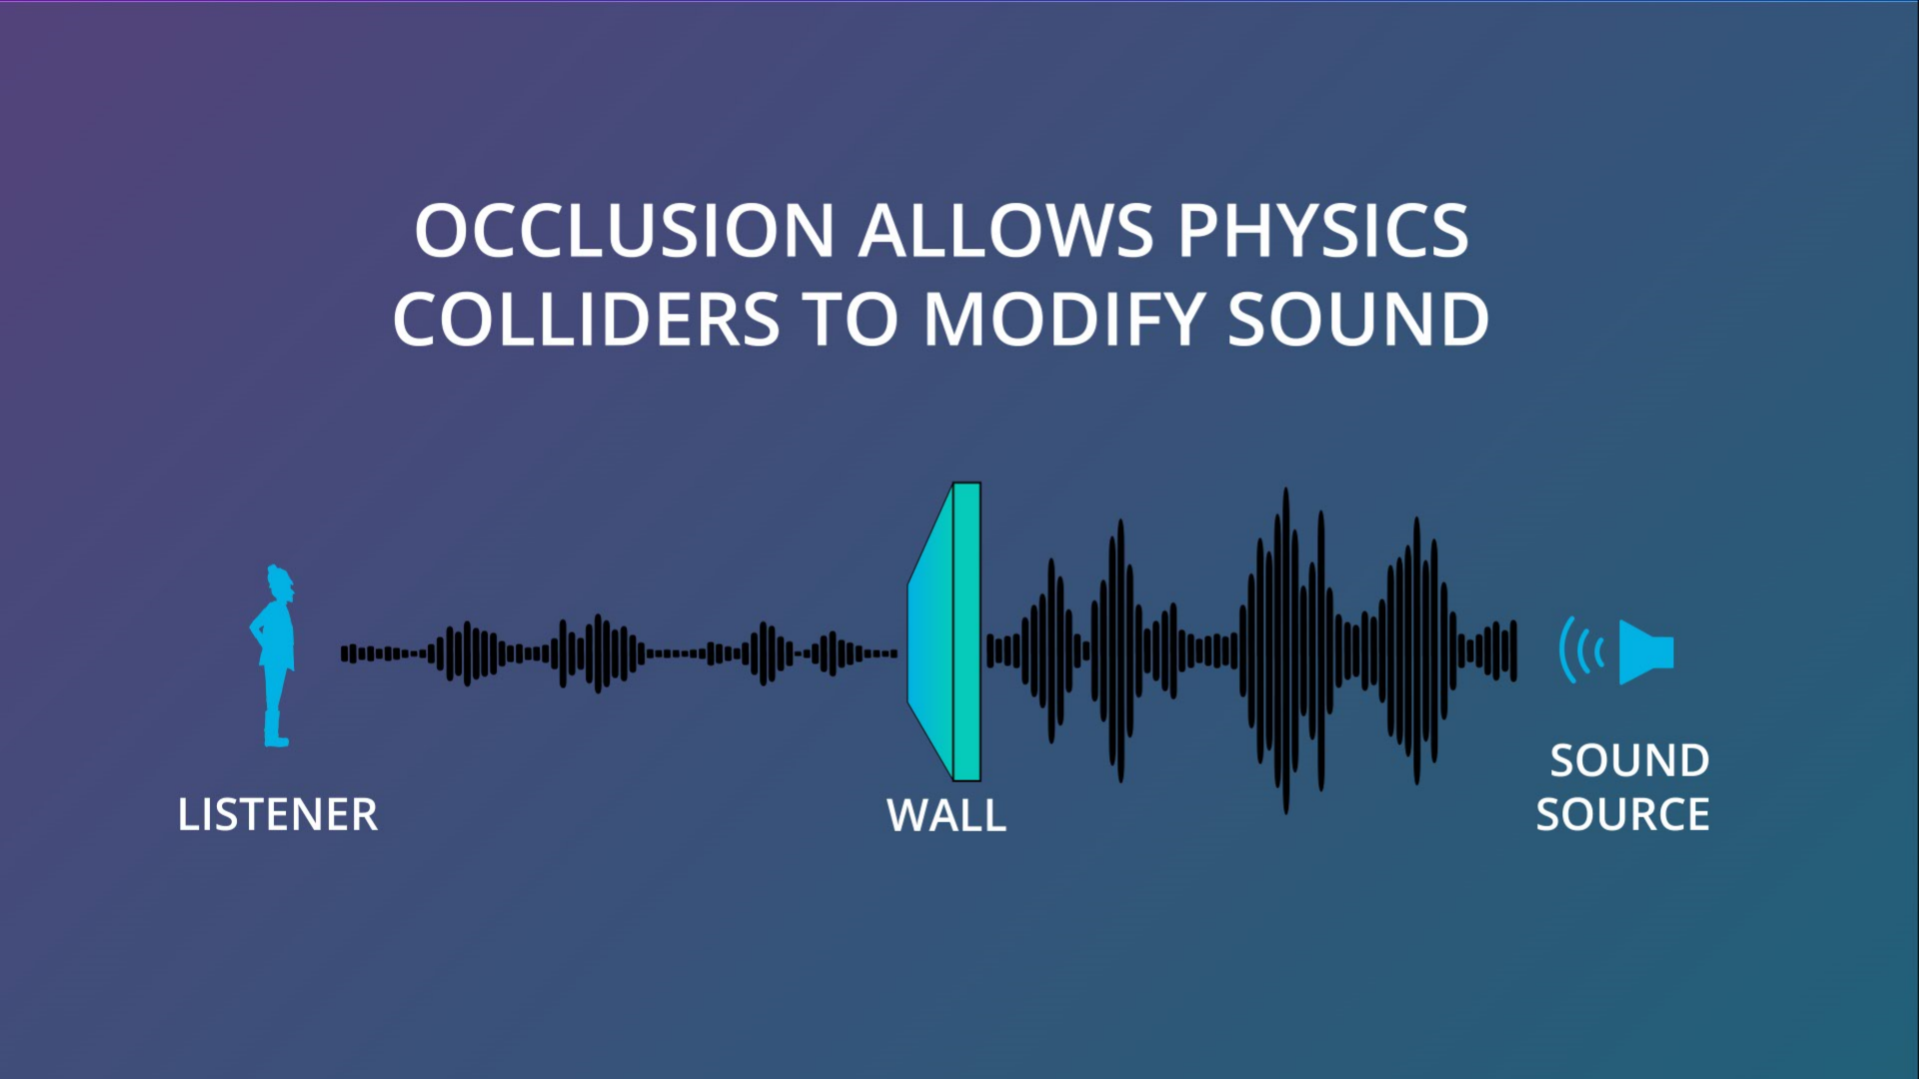
The Enable Occlusion option allows the spatialized audio to change when objects block the sound from directly reaching you.
The occlusion checkbox allow us to have one object pass in front of the other if necessary, and have the audio change slightly - if this happens in your film, where one person crosses between the camera and the speaker, or where the speaker goes behind an object, setting this will add an extra feeling of space to the audio.
Let’s try testing out the occlusion. Create a new cube and scale it so that it forms a wall between the camera and the sound sources. Play the scene and try moving the wall in front of the speakers and then away. You’ll hear the spatializer apply a low-pass filter over the audio and it will sound muffled.
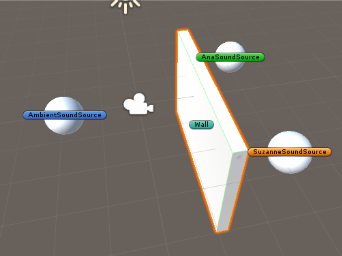
Try moving the wall in front and away from the speakers. The audio becomes muffled when it is occluded.
Tip: If you aren't noticing a difference, be sure that the Resonance Audio Source components have Enable Occlusion checked.
OK. Feel free to delete the wall now. It won’t be needed for our video.
You will also notice that when you add the audio components, a round gizmo appears when the object is selected.

Round shapes appear when spatial audio sources are selected.
This shows how each object emits sound - whether it emits that sound equally from all directions, or in a pattern that is more mono-directional.
We can change this pattern by modifying the “alpha” slider in the directivity panel.
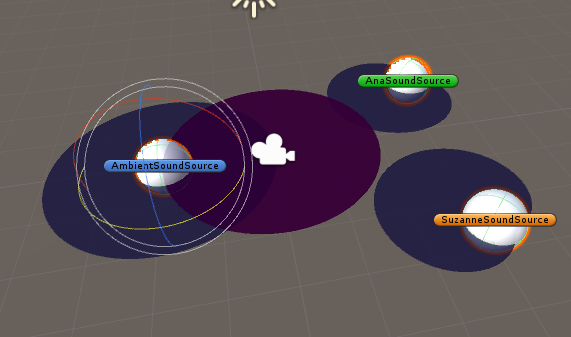
You can adjust the sound source directivity to force an audio source to have a different perceived loudness depending on its direction.
For a human speaking, directional sound makes the most sense, since the audio will emit only from one direction. Likewise, if we had a ‘radio’ as our soundtrack source, we might wish to do the same.
We can now animate our spheres - press control or command+6, to open the animation window.
Select one of your audio spheres, and then press ‘Create” to create our animation clip.
Add “position” and “rotation” as the properties we are going to animate.
Now, animate the sphere moving around the camera.
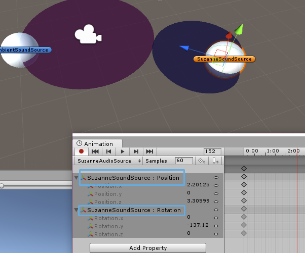
Add a keyframed animation of a sound source.